We are living in a house as old as we are, built before 1950. About a year after we moved in (when the house was a mere 50 years old) one of the faucets began failing. It took a lot of looking (there was no Amazon nor E-bay yet) to find a replacement. Nearly all modern faucets have a 4" (100 mm) spacing between the hot and cold inlets, but this was 8" (200 mm), and the sink is a style called Shelf Front. Now the Chicago Faucet Co. sells them on the Web, as this image from their online catalog shows.

The orifice in the aerator's top is 1/16" (1.6 mm) in diameter and the innards have some holes even smaller, before you get to the 5-mesh screen, with 0.3 mm holes. As you may imagine, any sediment that gets into the water pipes will be screened out in the aerator, at least the larger particles. That is why it is made to be disassembled, but I wonder how many people ever take one apart to clean it. They are not costly, so I reckon most folks just replace an aerator that starts "acting funny".
"Acting funny" is indeed what we encountered this morning, when the sound changed and water began flowing out rather irregularly. So I grabbed a pair of pliers and began.

 What I did after that was just turn on the water—not all the way, as it ran quite fast!—and hold the aerator, still in the ring, upside down and spray it. A lot of small bits of grit came out. This image shows them. I sprayed into the sink with the stopper closed, and wiped them out with a tissue after slowly draining the sink. Their brownish color shows they are composed mainly of iron minerals. These minerals form naturally inside the pipe, particularly on the hot side, if the water is somewhat hard.
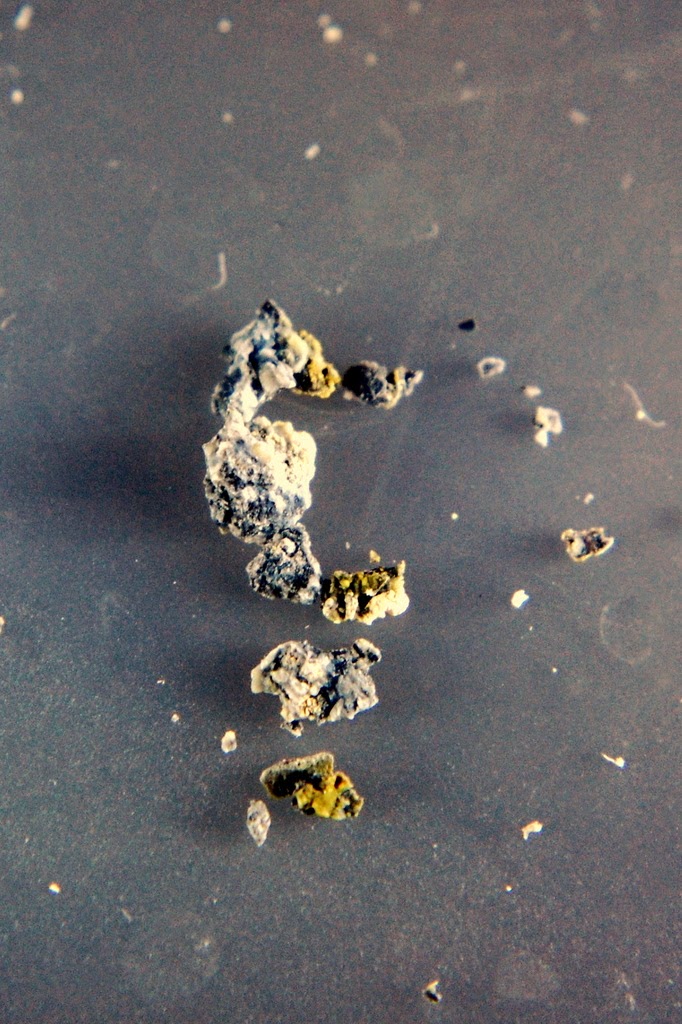 A couple of bits, one dark and the other shiny, are magnetic, so they probably come from wear inside the faucet. The image has been scaled to match the magnification of the one just above. As you can see, the larger chunks could just barely fit through the 1.6 mm orifice.
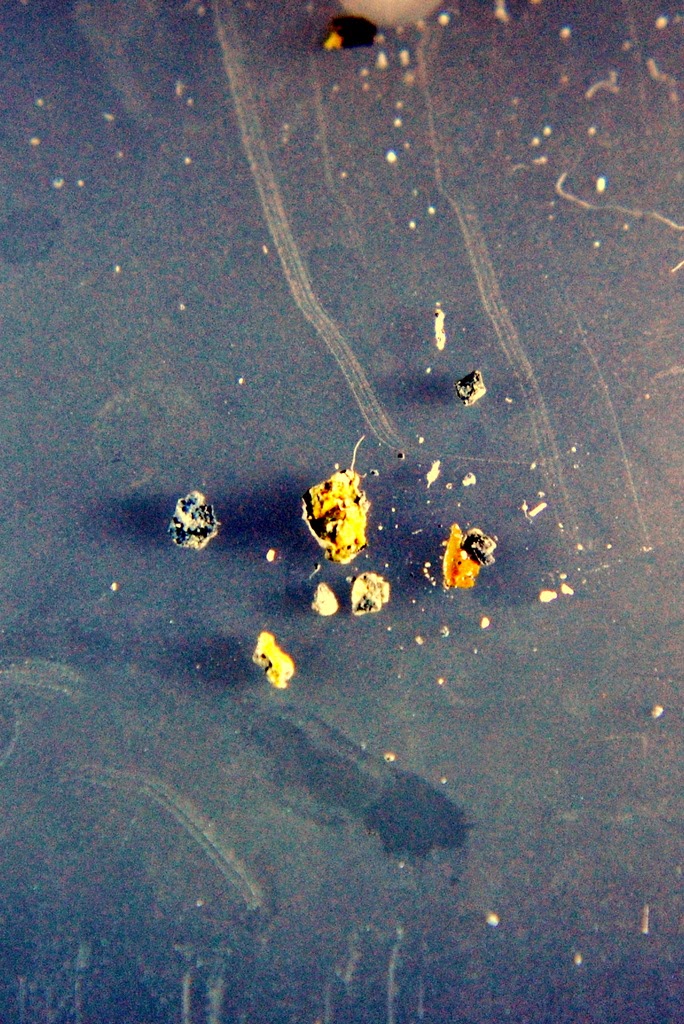
After collecting the grit, I ran the water full blast from the hot side first. A lot of things came out, and in larger sizes. The faster flow without the restricting orifice mobilized junk that had been collecting for years, probably at a turn in the pipe. This image shows them.

When I removed it again, the result was as you see in the large image above, with two large pieces of grit clogging the orifice, and I was sure, lots more inside. I guess I hadn't let the hot water run long enough.

Getting these parts clean was the trickiest part, but just involved some fiddly work with a toothpick.

The whole job took an hour, about as long as I've been writing this post! Is a little part like this worth an hour of my time? It would take at least an hour to go to a hardware or plumbing store and get one, and I'd be paying a couple dollars besides. I was brought up hearing a number of frugal New England proverbs, including
Use it Up
Wear it Out
Make it Do or
Do Without

The background is a black paper divider from a notebook. The translucent plate is the lid of a small butter tub. The two blue light sources are "work lights" with 24 LED's each, that I got at Harbor Freight. They have a magnet on the back, so I store them on the side of the refrigerator. I used folded bits of paper to tilt them slightly for better light. For larger-scale work I'll make a sheet metal holder that can point them more robustly, but for now this works great.


No comments:
Post a Comment